Cake
Tampilkan postingan dengan label Cake. Tampilkan semua postingan
My very best Vanilla Cake – stays moist 4 days!

My very best Vanilla Cake – stays moist 4 days!

 This is my best vanilla cake recipe. A classic butter cake but with Japanese techniques applied for the most plush, soft and moist yellow cake like you’ve never had before. Plus, this professional bakery style cake stays fresh and moist for 4 days — that’s unheard of!

Fluffier, more tender and less greasy than the typical vanilla cakes, much more moist than traditional sponge cakes, safer to make – and the same batter makes perfect Vanilla Cupcakes.


Ingredients

Cups

Metric

▢2 cups plain / all purpose flour (cake flour OK too, Note 1)

▢2 1/2 teaspoons baking powder (NOT baking soda, Note 2)

▢1/4 tsp salt

▢4 large eggs (50 - 55g / 2 oz each), at room temp (Note 3)

▢1 1/2 cups caster / superfine sugar (granulated/regular ok too, Note 2)

▢115g / 1/2 cup unsalted butter , cut into 1.5cm / 1/2” cubes (or so)

▢1 cup milk , full fat (Note 5)

▢3 tsp vanilla extract , the best you can afford (Note 6)

▢3 tsp vegetable or canola oil (Note 7)

VANILLA BUTTERCREAM

▢225g / 2 sticks unsalted butter , softened

▢500g / 1 lb soft icing sugar / powdered sugar , SIFTED

▢3 tsp vanilla extract

▢2 - 4 tbsp milk , to adjust thickeness


Instructions

PREPARATION:

Preheat oven to 180°C/350°F (160°C fan) for 20 minutes before starting the batter (Note 8). Place shelf in the middle of the oven.

Grease 2 x 20cm / 8” cake pans with butter, then line with parchment / baking paper. (Note 9 more pan sizes) Best to use cake pan without loose base, if you can.

COMBINE DRY INGREDIENTS

Whisk flour, baking powder and salt in a large bowl. Set aside.

BEAT EGGS UNTIL AERATED:

Beat eggs for 30 seconds on speed 6 of a Stand Mixer fitted with a whisk attachment, or hand beater.

With the beater still going, pour the sugar in over 45 seconds.

Then beat for 7 minutes on speed 8, or until tripled in volume and white.

FINISH CAKE BATTER:

Heat Milk-Butter: While egg is beating, place butter and milk in a heatproof jug and microwave 2 minutes on high to melt butter (or use stove). Do not let milk bubble and boil (foam ok). Don’t do this ahead and let the milk cool (this affects rise).

Gently add flour: When the egg is whipped, scatter 1/3 flour across surface, then beat on Speed 1 for 5 seconds. Add half remaining flour, then mix on Speed 1 for 5 sec. Add remaining flour, then mix on Speed 1 for 5 - 10 sec until the flour is just mixed in. Once you can’t see flour, stop straight away.

Lighten hot milk with some Egg Batter: Pour hot milk, vanilla and oil into the now empty flour bowl. Add about 1 1/2 cups (2 ladles or so) of the Egg Batter into the Milk-Butter (don't need to be 100% accurate with amount). Use a whisk to mix until smooth - you can be vigorous here. Will look foamy.

Slowly add milk: Turn beater back on Speed 1 then pour the Milk mixture into the Egg Batter over 15 seconds, then turn beater off.

Scrape and final mix: Scrape down sides and base of bowl. Beat on Speed 1 for 10 seconds - batter should now be smooth and pourable.

BAKE:

Pour batter into pans.

Knock out bubbles: Bang each cake pan on the counter 3 times to knock out big bubbles (Note 10 for why)

Bake 30 minutes or until golden and toothpick inserted into centre comes out clean.

COOL & FROST:

Remove from oven. Cool in cake pans for 15 minutes, then gently turn out onto cooling racks. If using as layer cakes, cool upside down - slight dome will flatten perfectly. Level cake = neat layers.

Frost with frosting of choice, or cream and fresh berries or jam. See list of ideas in post!

VANILLA BUTTERCREAM:

Beat butter with whisk attachment in stand mixer for 1 minute until creamy. Add icing sugar / powdered sugar in 3 lots, beating slowly (to avoid a powder storm) then once mostly incorporated, beat on high for a full 3 minutes until fluffy.

Add vanilla and milk, then beat for a further 30 seconds. Use milk to make it lovely and soft but still holds it's form (eg for piping). Use immediately. (If you make ahead, refrigerate then beat to re-fluff).

Tips For Perfect Chocolate Ganache Drip Cakes

Tips For Perfect Chocolate Ganache Drip Cakes

 One of my favorite easy things to dress up a cake is to do a chocolate ganache drip finish. Over the years, my ability to create the drip look has definitely grown, and I get tons of questions asking what my secret is. 

The truth is, chocolate ganache has definitely put me through the wringer before (especially white chocolate ganache, which used to be my absolute nemesis). After figuring out the perfect ratio for chocolate to heavy whipping cream and learning the do’s and dont’s of drip cakes, I’ve got it down to a science these days. And now you will too!

This chocolate ganache recipe has been my go-to forever, and it involves only two ingredients: chocolate and heavy whipping cream. There’s no need to be intimidated with this one – just bring the heavy whipping cream to a simmer, pour it over the chocolate, whisk it together until it’s uniform, and give it time to set up. 

The type of chocolate you use will determine the amount of heavy whipping cream to incorporate for the perfect consistency. Although semi-sweet chocolate is the most common type I use for drip cakes, I’ve listed the ratios I use for all different types of chocolate below.


Ingredients

1 cup (185g) semi-sweet chocolate chips, or a bar chopped up into bits

1 cup (240ml) heavy whipping cream


Instructions

Place chocolate chips into a heat resistant bowl (glass or metal). If you’re starting with a chocolate bar, chop it into small pieces until they’re about the size of chocolate chips. 

In a saucepan over medium-high heat, warm heavy whipping cream until it just starts to simmer. I always look for small bubbles forming around the edge and a soft simmer starting in the middle. When it's reached this point, pour the cream into your bowl of chocolate and let sit for about 30 seconds. 

Whisk it together until it’s uniform in consistency and there are no bits of chocolate left on your whisk. Cool ganache at room temperature for 10-20 minutes, or until the ganache itself is room temperature or slightly above. 

The Perfect One-Bowl Chocolate Cake Recipe

The Perfect One-Bowl Chocolate Cake Recipe

 Update 2019: I’ve changed the measurements in the recipe below to make exactly enough batter for three 6-inch cake pans or two 9-inch cake pans. I always do triple 6-inch layers when making cakes (I like ‘em tall!), and since I get so many questions on how to convert the original recipe into three 6-inch layers I thought I’d just do the math for you. So same great recipe, with the most requested amount of batter! 

You can pair this chocolate cake with almost any buttercream, but I’ve chosen to pair it with my favorite chocolate buttercream recipe to really enhance the chocolate flavor. In the past I’ve paired it with cherry, raspberry, almond, salted caramel, and vanilla buttercreams and those pairings have been super tasty.


Ingredients

2 Cups (265g) all purpose flour

1 2/3 Cups (340g) white granulated sugar

2/3 Cup (60g) unsweetened natural cocoa powder (not Dutch Process)

2 tsp baking soda

1 tsp baking powder

1/2 tsp kosher salt

1/2 Cup (120ml) vegetable oil

2 eggs, room temperature

1 1/2 tsp pure vanilla extract

1 Cup (240ml) full-fat buttermilk*, room temperature DIY recipe in the notes

1 Cup (240ml) hot water


Instructions

Preheat the oven to 350ºF and prepare three 6-inch or two 8-inch cake pans by spraying the sides with cooking spray and fitting the bottoms with a wax paper or parchment cake circle. 

Place all of the dry ingredients into the bowl of a stand mixer and stir on low for 30 seconds to fully combine them. Add the vegetable oil, eggs, vanilla, and buttermilk and mix on low until just combined. With the mixer still on low, add the hot water in a slow stream, then turn the mixer to medium and beat until smooth, about 2 minutes. The batter will be very thin. 

Pour into prepared cake pans no more than 2/3 full and bake for 40-45 minutes, until a wooden toothpick inserted comes out clean. Cool completely before frosting with chocolate buttercream or frosting of your choice.

Carrot Cake Roll with Cream Cheese Frosting Filling

Carrot Cake Roll with Cream Cheese Frosting Filling

  MADE WITH THE PERFECT RATIO OF SPICES, JUST ENOUGH SO THAT THE FLAVORS BLEND PERFECTLY THROUGHOUT THIS WONDERFULLY MOIST CAKE!  THE BEST PART IS PROBABLY THE RICH AND BUTTERY CREAM CHEESE FROSTING FILLING THE CENTER IN EVERY SINGLE BITE YOU TAKE.  ITS THE ULTIMATE DESSERT MATCH MADE IN HEAVEN!

DONT BE INTIMIDATED BY BAKING A CAKE ROLL IS THAT IT’S MUCH EASIER TO MAKE THAN IT LOOKS! I PROMISE!  YOU CAN MAKE THE ENTIRE RECIPE, THE CAKE AND THE CREAM CHEESE FROSTING, COMPLETELY BY HAND. USING A MIXER IS NOT REQUIRED!

IF YOU DON’T WANT TO GRATE THE CARROTS BY HAND, YOU DONT NEED TO,  STORE BOUGHT WORKS JUST AS WELL AND IT WILL SAVE YOU A STEP TOO!   YOU CAN EVEN GRATE THEM IN YOUR FOOD PROCESSOR, IF YOU DON’T FEEL LIKE GRATING THEM BY HAND.


Ingredients:

For the Cake:

3/4 cup flour

2 tsp. ground cinnamon

1 tsp. baking powder

1/2 tsp. kosher salt

1/2 tsp. ground ginger

1/4 tsp. ground nutmeg

1/8 tsp. ground cloves

3 large eggs

1/2 cup granulated sugar

2 tbsp. vegetable oil

1 tsp. pure vanilla extract

3 medium carrots, shredded

For the Filling:

1 cup confectioners sugar

1 (8 oz.) package cream cheese, softened

6 tbsp. salted butter, softened

1 tsp. pure vanilla extract

For the Glaze Drizzle:

3 cups confectioners sugar

1/2 teaspoon vanilla extract

10-11 tbsp. milk


Instructions

Preheat oven to 375 degrees F and line a 15 x 10 inch jelly roll pan with parchment paper, leaving a little overhang on each side.

In a medium bowl, combine flour, cinnamon, baking powder, salt, ginger, nutmeg, and cloves and whisk.

In a large bowl, combine eggs and sugar and whisk until combined.

Add vegetable oil, vanilla extract, and carrots and mix again until combined.

Pour the dry ingredients into the large bowl and fold to combine.

Stir batter just until combined. Pour batter into the jelly roll pan and spread into an even layer. Bake for 12 minutes and remove the cake from the pan using the overhang on the sides.

Lay cake on a large wood cutting board and gently roll the cake lengthwise.

Carefully transfer the cake to a cooling rack and let cool completely.

To prepare the filling,

combine confectioners sugar, cream cheese, butter, and vanilla extract in a medium bowl and whisk until smooth and creamy.

Carefully unroll the cake and spread the filling onto the cake, allowing for a small gap on all edges.

Reroll the cake and wrap it tightly with plastic cling wrap.

Chill in the fridge for 1 hour before serving.

When ready to serve, combine the glaze ingredients in a mixing bowl and whisk until smooth. Drizzle over the cake and slice.

ENJOY!

FLOURLESS FALLEN CHOCOLATE CAKE

FLOURLESS FALLEN CHOCOLATE CAKE

 Stunningly beautiful and ridiculously tasty? Get you a cake that can do both. This flourless chocolate cake is super chocolatey with the most amazing fudgy, yet light texture. DROOL. Plus this fallen chocolate cake only calls for 7 ingredients!

I’m a little ashamed to say this, but I can be pretty shallow when it comes to desserts. What can I say, I enjoy beautiful things. Sue me.

But what *really* gets me going is a dessert that tastes just as beautiful as it looks. That’s where this super chocolatey flourless chocolate cake comes in. It falls and crackles in the most lovely chocolatey way, and with the most tender texture that’s fudgy and light at all once. Plus it’s gluten free!


INGREDIENTS

8 ounces chocolate, roughly chopped

1/2 cup unsalted butter, cut into pieces

5 large eggs, separated

3/4 cup granulated sugar

2 teaspoons vanilla extract

1/2 teaspoon salt

2 Tablespoons cocoa powder


INSTRUCTIONS

Preheat the oven to 325°F and generously butter a 9 inch springform pan with butter, then dust with cocoa powder. Set aside.

In a large microwave safe bowl combine the cubes of  butter and chopped chocolate. Place in the microwave in thirty second intervals, stirring well between each interval. Repeat until completely melted and no clumps of chocolate remain. Set aside to cool slightly.

While the chocolate cools, separate the egg whites from the yolks, placing the yolks in a separate bowl and the egg whites in the bowl of a stand mixer fit with the whisk attachment.

Beat the egg whites on medium speed, gradually increasing to high as you stream in granulated sugar to aerate the egg whites. Continue beating on high until medium stiff peaks form.

While the egg whites are beating, add the yolks one at time into the chocolate and butter mixture, whisking in between each addition. Add the vanilla, salt, and cocoa powder, whisk to combine.

Gradually incorporate the whipped egg whites into the chocolate mixture by dropping large spoonfuls at a time into the chocolate mixture and folding to combine. Mix until combined and no streaks of egg whites or cocoa powder remain. Do not over mix.

Spoon the batter into the prepared pan, using the back of a spoon or a rubber spatula to spread into an even layer.

Bake at 325°F for 45 to 50 minutes or until a knife inserted into the middle comes out clean and the edges of the cake start to pull away from the sides of the pan.

Allow to cool completely before removing from the springform pan and serving with whipped cream, raspberries or powdered sugar! Enjoy!

RED WINE CHOCOLATE CAKE

RED WINE CHOCOLATE CAKE

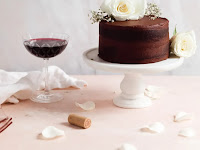
 Use up that leftover red wine with this super fudgy bold chocolate layer cake. This red wine chocolate cake is frosted with a rich chocolate buttercream for the perfect grown up chocolate treat perfect for Valentine’s Day!

This recipe is in partnership with ALDI.

Happy almost Valentine’s Day, my loves! Valentine’s Day is one of my absolute favorite days because it’s totally acceptable to eat chocolate covered strawberries and brownies all day. I mean…a holiday all about chocolate and love? What’s not to like? And this year we’ll be celebrating it with this seriously tasty red wine chocolate cake. It’s bold, it’s fudgy, it’s chocolatey and it’s super easy to make.


INGREDIENTS

For The Red Wine Chocolate Cake

1 ½ cups Baker’s Corner Granulated Sugar

½ cup Baker’s Corner Baking Cocoa

1 ⅓ cups Baker’s Corner All Purpose Flour

1 teaspoon baking soda

1 ¼ teaspoons baking powder

½ teaspoon salt

½ cup vegetable oil

2 eggs, beaten

2 teaspoons vanilla extract

1 cup Intermingle Red Wine Blend

For The Frosting

½ cup unsalted butter, room temperature

⅓ cup Baker’s Corner Baking Cocoa

1 ½ cups powdered sugar

1 teaspoon vanilla extract

2 – 3 Tablespoons Intermingle Red Wine Blend

¼ teaspoon salt


INSTRUCTIONS

Preheat the oven to 350°F and line two 6-inch cake pans with parchment paper on the bottom. Grease the sides.

In a large mixing bowl combine the Baker’s Corner Granulated Sugar, cocoa powder, all purpose flour, baking soda, baking powder and salt. Whisk to combine.

Make a well in the center and add the vegetable oil, vanilla extract, eggs, and red wine. Whisk until the batter is smooth and no lumps of flour remain.

Divide the batter evenly between the two pans and bake for 30 minutes or until a knife inserted into the middle comes out mostly clean. Allow the cakes to cool for 10 minutes before removing from the pans and transferring to a wire rack to cool completely before frosting.

While the cakes cool, combine the butter, cocoa powder, powdered sugar, salt, Intermingle Red Wine Blend, and vanilla in a stand mixer fit with the paddle attachment. Beat on low, gradually increasing the speed to high. Mix until fluffy and no streaks of cocoa powder combine.

Once the cakes are cool, place one layer on a cake stand, spread about half of the buttercream in the middle of the cake. Place the next layer on top of the cake and use an offset spatula to frost the outside of the cake, scraping off any excess frosting. Serve with red wine (obviously). Enjoy!

HOT COCOA BOMBS WITH A MINTY TWIST

HOT COCOA BOMBS WITH A MINTY TWIST

 Hot cocoa bombs are all the rage, and it’s easy to see why. After all, there’s nothing better than a nice, steaming cup of hot cocoa on a cold winter day. While the frigid wind blows, you’re all snug in your toasty home drinking a cup of equally toasty chocolate goodness, safe from the falling temperatures and icy wind outside.

There’s really nothing quite as cozy as hot cocoa. In fact, the only thing better than hot cocoa is homemade hot cocoa bombs. Not only do they make a delicious mug of liquid Heaven, but they are also little works of art, to boot.

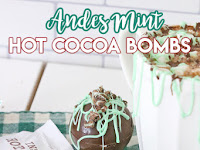
Our hot cocoa bombs have a delicious minty twist because we use Andes Mints in the recipe. It adds both an extra level of richness to the hot cocoa as well as an unexpected minty kick that goes perfectly with the chocolate.


Ingredients

12 Ounces of  Melting Chocolate – Chips or Almond Bark

2 packets of Hot Cocoa Mix – about 1 heaping teaspoon in each Cocoa bomb

1 cup of Mini Marshmallows – about 5 to each Cocoa Bomb

One package of  Andes Mint Chocolates  – 1 crumbled Andes Mint in each Cocoa Bomb – Andes Mints to decorate the tops

6 cups of Hot Milk

1 set of Silicone Molds

Melted White Chocolate to drizzle on top

Mint Green Food Coloring Gel


Instructions

Place the Chocolate in a Microwave safe bowl, and melt until smooth and creamy.

Stir well, and spoon or ladle into the molds, making sure to coat the inside of the molds.

Pour excess chocolate back into the bowl, and place the molds in the refrigerator, and let harden for 15 minutes

Remove molds from refrigerator, and carefully remove chocolate from molds, placing 6 half balls in a row on a cookie sheet.   These will be the bottom parts, or half of the Cocoa bombs. 

Heat a non stick Skillet, on low, and place one half ball with the open side down, melting just the edges for a few seconds, remove, place on a cookie sheet, and fill the Ball with the powdered Cocoa, 

Crumbled Andes Mint, and mini Marshmallows.  Repeat, until all 6 Balls are done.

Place the other half of the Chocolate balls in the skillet, with the open side down, and melt just the edges of the ball. 

Remove from the Skillet, and immediately place on one of the chocolate balls, filled with the cocoa, etc., making the top of the ball/bomb.

 Hold in place a few seconds to make sure the top and bottom are melted together.

When all the Cocoa Bombs have been filled, and melted together, place them in the refrigerator for 30 minutes, until chocolate is completely set.

 Remove from the Refrigerator, and sit the cookie sheet on the counter.

Place White Chocolate in a microwave safe bowl, and microwave at 15 second intervals until the chocolate melts.  Add the Mint Green Food Coloring Gel, and stir well. 

Place the melted chocolate in a Pastry bag, and pipe the White Chocolate over the Cocoa Bombs and sprinkle with Crumbled Andes Mints, placing one mint on the top.

 Place one Hot Cocoa Bomb in the bottom of a large mug, and pour heated milk over the top.   Cocoa Bomb will melt and bubble, and marshmallows will float to the top.  Stir the powdered cocoa, and Enjoy!

CHOCOLATE PEANUT BUTTER CAKE RECIPE

CHOCOLATE PEANUT BUTTER CAKE RECIPE

 You will love this Chocolate Peanut Butter Cake Recipe! It’s the perfect combination of creamy peanut butter filling rich chocolate cake topped with chocolate ganache.

Chocolate Peanut Putter Butter Recipe is the perfect cake for the chocolate and peanut butter lover like myself. This easy cake has become our go to for birthday’s and almost any other special occasion.  

Yes we have plenty of chocolate and peanut butter lovers in the family. But this cake would be a hit even if they weren’t your first choice.


Ingredients

Chocolate Cake

3/4 cup butter, soft

3 eggs

2 cups flour

2 cups sugar

3/4 cups cocoa powder

1 1/2 tsp baking soda

1 1/2 tsp salt

1/4 tsp baking powder

1/2 tsp vanilla

1 cup milk

1 cup buttermilk

2 tsp vegetable oil

1/2 small pkg instant chocolate pudding mix

Peanut Butter Frosting

1 cup creamy peanut butter

2 sticks butter, room temp

3 cups powdered sugar

1/2 tsp vanilla

Chocolate Ganache

1 1/2 cups chocolate chips

1 cup heavy whipping cream


Instructions

FOR THE CAKE

In mixer, cream butter and sugar together

Add eggs 1 at a time. Beat in vanilla

Combine all the dry ingredients in a separate bowl (including pudding mix)

Add dry mix to the mixing bowl alternating with the milk and buttermilk.

Add the vegetable oil and mix until well combined and not lumpy

Pour into greased/floured cake pans (2 ) 8in

Bake at 350 for about 20-25 mins until toothpick comes out clean.

Let cool 10 minutes before removing from pan


FOR THE PEANUT BUTTER FILLING

In mixer combine room temperature butter and peanut butter and beat until fluffy

Beat in vanilla and add in powdered sugar a little at a time

Mix until the frosting is smooth and fluffy

Spread over bottom layer of cake

Top frosting with the 2nd cake


FOR THE GANACHE

In a small saucepan, heat heavy whipping cream until just before it boils

Pour chocolate chips into a separate bowl

Add hot heavy whipping cream to chocolate chips and whisk until smooth consistency

Let cool for a few minutes and pour over cake starting in the center and letting in spill over the sides of the cake

Leave plain or top the cake with chopped peanut butter cups, peanut butter chips, chocolate chips, chocolate curls ect.