Februari 2021
My very best Vanilla Cake – stays moist 4 days!

My very best Vanilla Cake – stays moist 4 days!

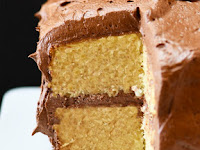
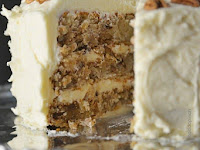
 This is my best vanilla cake recipe. A classic butter cake but with Japanese techniques applied for the most plush, soft and moist yellow cake like you’ve never had before. Plus, this professional bakery style cake stays fresh and moist for 4 days — that’s unheard of!

Fluffier, more tender and less greasy than the typical vanilla cakes, much more moist than traditional sponge cakes, safer to make – and the same batter makes perfect Vanilla Cupcakes.


Ingredients

Cups

Metric

▢2 cups plain / all purpose flour (cake flour OK too, Note 1)

▢2 1/2 teaspoons baking powder (NOT baking soda, Note 2)

▢1/4 tsp salt

▢4 large eggs (50 - 55g / 2 oz each), at room temp (Note 3)

▢1 1/2 cups caster / superfine sugar (granulated/regular ok too, Note 2)

▢115g / 1/2 cup unsalted butter , cut into 1.5cm / 1/2” cubes (or so)

▢1 cup milk , full fat (Note 5)

▢3 tsp vanilla extract , the best you can afford (Note 6)

▢3 tsp vegetable or canola oil (Note 7)

VANILLA BUTTERCREAM

▢225g / 2 sticks unsalted butter , softened

▢500g / 1 lb soft icing sugar / powdered sugar , SIFTED

▢3 tsp vanilla extract

▢2 - 4 tbsp milk , to adjust thickeness


Instructions

PREPARATION:

Preheat oven to 180°C/350°F (160°C fan) for 20 minutes before starting the batter (Note 8). Place shelf in the middle of the oven.

Grease 2 x 20cm / 8” cake pans with butter, then line with parchment / baking paper. (Note 9 more pan sizes) Best to use cake pan without loose base, if you can.

COMBINE DRY INGREDIENTS

Whisk flour, baking powder and salt in a large bowl. Set aside.

BEAT EGGS UNTIL AERATED:

Beat eggs for 30 seconds on speed 6 of a Stand Mixer fitted with a whisk attachment, or hand beater.

With the beater still going, pour the sugar in over 45 seconds.

Then beat for 7 minutes on speed 8, or until tripled in volume and white.

FINISH CAKE BATTER:

Heat Milk-Butter: While egg is beating, place butter and milk in a heatproof jug and microwave 2 minutes on high to melt butter (or use stove). Do not let milk bubble and boil (foam ok). Don’t do this ahead and let the milk cool (this affects rise).

Gently add flour: When the egg is whipped, scatter 1/3 flour across surface, then beat on Speed 1 for 5 seconds. Add half remaining flour, then mix on Speed 1 for 5 sec. Add remaining flour, then mix on Speed 1 for 5 - 10 sec until the flour is just mixed in. Once you can’t see flour, stop straight away.

Lighten hot milk with some Egg Batter: Pour hot milk, vanilla and oil into the now empty flour bowl. Add about 1 1/2 cups (2 ladles or so) of the Egg Batter into the Milk-Butter (don't need to be 100% accurate with amount). Use a whisk to mix until smooth - you can be vigorous here. Will look foamy.

Slowly add milk: Turn beater back on Speed 1 then pour the Milk mixture into the Egg Batter over 15 seconds, then turn beater off.

Scrape and final mix: Scrape down sides and base of bowl. Beat on Speed 1 for 10 seconds - batter should now be smooth and pourable.

BAKE:

Pour batter into pans.

Knock out bubbles: Bang each cake pan on the counter 3 times to knock out big bubbles (Note 10 for why)

Bake 30 minutes or until golden and toothpick inserted into centre comes out clean.

COOL & FROST:

Remove from oven. Cool in cake pans for 15 minutes, then gently turn out onto cooling racks. If using as layer cakes, cool upside down - slight dome will flatten perfectly. Level cake = neat layers.

Frost with frosting of choice, or cream and fresh berries or jam. See list of ideas in post!

VANILLA BUTTERCREAM:

Beat butter with whisk attachment in stand mixer for 1 minute until creamy. Add icing sugar / powdered sugar in 3 lots, beating slowly (to avoid a powder storm) then once mostly incorporated, beat on high for a full 3 minutes until fluffy.

Add vanilla and milk, then beat for a further 30 seconds. Use milk to make it lovely and soft but still holds it's form (eg for piping). Use immediately. (If you make ahead, refrigerate then beat to re-fluff).

Tips For Perfect Chocolate Ganache Drip Cakes

Tips For Perfect Chocolate Ganache Drip Cakes

 One of my favorite easy things to dress up a cake is to do a chocolate ganache drip finish. Over the years, my ability to create the drip look has definitely grown, and I get tons of questions asking what my secret is. 

The truth is, chocolate ganache has definitely put me through the wringer before (especially white chocolate ganache, which used to be my absolute nemesis). After figuring out the perfect ratio for chocolate to heavy whipping cream and learning the do’s and dont’s of drip cakes, I’ve got it down to a science these days. And now you will too!

This chocolate ganache recipe has been my go-to forever, and it involves only two ingredients: chocolate and heavy whipping cream. There’s no need to be intimidated with this one – just bring the heavy whipping cream to a simmer, pour it over the chocolate, whisk it together until it’s uniform, and give it time to set up. 

The type of chocolate you use will determine the amount of heavy whipping cream to incorporate for the perfect consistency. Although semi-sweet chocolate is the most common type I use for drip cakes, I’ve listed the ratios I use for all different types of chocolate below.


Ingredients

1 cup (185g) semi-sweet chocolate chips, or a bar chopped up into bits

1 cup (240ml) heavy whipping cream


Instructions

Place chocolate chips into a heat resistant bowl (glass or metal). If you’re starting with a chocolate bar, chop it into small pieces until they’re about the size of chocolate chips. 

In a saucepan over medium-high heat, warm heavy whipping cream until it just starts to simmer. I always look for small bubbles forming around the edge and a soft simmer starting in the middle. When it's reached this point, pour the cream into your bowl of chocolate and let sit for about 30 seconds. 

Whisk it together until it’s uniform in consistency and there are no bits of chocolate left on your whisk. Cool ganache at room temperature for 10-20 minutes, or until the ganache itself is room temperature or slightly above. 

The Perfect One-Bowl Chocolate Cake Recipe

The Perfect One-Bowl Chocolate Cake Recipe

 Update 2019: I’ve changed the measurements in the recipe below to make exactly enough batter for three 6-inch cake pans or two 9-inch cake pans. I always do triple 6-inch layers when making cakes (I like ‘em tall!), and since I get so many questions on how to convert the original recipe into three 6-inch layers I thought I’d just do the math for you. So same great recipe, with the most requested amount of batter! 

You can pair this chocolate cake with almost any buttercream, but I’ve chosen to pair it with my favorite chocolate buttercream recipe to really enhance the chocolate flavor. In the past I’ve paired it with cherry, raspberry, almond, salted caramel, and vanilla buttercreams and those pairings have been super tasty.


Ingredients

2 Cups (265g) all purpose flour

1 2/3 Cups (340g) white granulated sugar

2/3 Cup (60g) unsweetened natural cocoa powder (not Dutch Process)

2 tsp baking soda

1 tsp baking powder

1/2 tsp kosher salt

1/2 Cup (120ml) vegetable oil

2 eggs, room temperature

1 1/2 tsp pure vanilla extract

1 Cup (240ml) full-fat buttermilk*, room temperature DIY recipe in the notes

1 Cup (240ml) hot water


Instructions

Preheat the oven to 350ºF and prepare three 6-inch or two 8-inch cake pans by spraying the sides with cooking spray and fitting the bottoms with a wax paper or parchment cake circle. 

Place all of the dry ingredients into the bowl of a stand mixer and stir on low for 30 seconds to fully combine them. Add the vegetable oil, eggs, vanilla, and buttermilk and mix on low until just combined. With the mixer still on low, add the hot water in a slow stream, then turn the mixer to medium and beat until smooth, about 2 minutes. The batter will be very thin. 

Pour into prepared cake pans no more than 2/3 full and bake for 40-45 minutes, until a wooden toothpick inserted comes out clean. Cool completely before frosting with chocolate buttercream or frosting of your choice.

Carrot Cake Roll with Cream Cheese Frosting Filling

Carrot Cake Roll with Cream Cheese Frosting Filling

  MADE WITH THE PERFECT RATIO OF SPICES, JUST ENOUGH SO THAT THE FLAVORS BLEND PERFECTLY THROUGHOUT THIS WONDERFULLY MOIST CAKE!  THE BEST PART IS PROBABLY THE RICH AND BUTTERY CREAM CHEESE FROSTING FILLING THE CENTER IN EVERY SINGLE BITE YOU TAKE.  ITS THE ULTIMATE DESSERT MATCH MADE IN HEAVEN!

DONT BE INTIMIDATED BY BAKING A CAKE ROLL IS THAT IT’S MUCH EASIER TO MAKE THAN IT LOOKS! I PROMISE!  YOU CAN MAKE THE ENTIRE RECIPE, THE CAKE AND THE CREAM CHEESE FROSTING, COMPLETELY BY HAND. USING A MIXER IS NOT REQUIRED!

IF YOU DON’T WANT TO GRATE THE CARROTS BY HAND, YOU DONT NEED TO,  STORE BOUGHT WORKS JUST AS WELL AND IT WILL SAVE YOU A STEP TOO!   YOU CAN EVEN GRATE THEM IN YOUR FOOD PROCESSOR, IF YOU DON’T FEEL LIKE GRATING THEM BY HAND.


Ingredients:

For the Cake:

3/4 cup flour

2 tsp. ground cinnamon

1 tsp. baking powder

1/2 tsp. kosher salt

1/2 tsp. ground ginger

1/4 tsp. ground nutmeg

1/8 tsp. ground cloves

3 large eggs

1/2 cup granulated sugar

2 tbsp. vegetable oil

1 tsp. pure vanilla extract

3 medium carrots, shredded

For the Filling:

1 cup confectioners sugar

1 (8 oz.) package cream cheese, softened

6 tbsp. salted butter, softened

1 tsp. pure vanilla extract

For the Glaze Drizzle:

3 cups confectioners sugar

1/2 teaspoon vanilla extract

10-11 tbsp. milk


Instructions

Preheat oven to 375 degrees F and line a 15 x 10 inch jelly roll pan with parchment paper, leaving a little overhang on each side.

In a medium bowl, combine flour, cinnamon, baking powder, salt, ginger, nutmeg, and cloves and whisk.

In a large bowl, combine eggs and sugar and whisk until combined.

Add vegetable oil, vanilla extract, and carrots and mix again until combined.

Pour the dry ingredients into the large bowl and fold to combine.

Stir batter just until combined. Pour batter into the jelly roll pan and spread into an even layer. Bake for 12 minutes and remove the cake from the pan using the overhang on the sides.

Lay cake on a large wood cutting board and gently roll the cake lengthwise.

Carefully transfer the cake to a cooling rack and let cool completely.

To prepare the filling,

combine confectioners sugar, cream cheese, butter, and vanilla extract in a medium bowl and whisk until smooth and creamy.

Carefully unroll the cake and spread the filling onto the cake, allowing for a small gap on all edges.

Reroll the cake and wrap it tightly with plastic cling wrap.

Chill in the fridge for 1 hour before serving.

When ready to serve, combine the glaze ingredients in a mixing bowl and whisk until smooth. Drizzle over the cake and slice.

ENJOY!

PEANUT BUTTER CHOCOLATE CUPCAKES

PEANUT BUTTER CHOCOLATE CUPCAKES

 All your favorite flavors all wrapped up into one handheld cupcake? Yes, PLEASE. These fudgy chocolate cupcakes are topped with a dreamy peanut butter buttercream and finished off with a salted caramel drizzle. How you say… drool? Grab the recipe for these peanut butter chocolate cupcakes below!

I think we could all use a peanut butter chocolate cupcake drizzled with salted caramel today. Probably for breakfast. At least that’s what I could use, and I’d feel a lot better about it if we all ate these indulgent cupcakes together. Plus they’re super easy to make, easy to share, and even easier to eat!


INGREDIENTS

For The Chocolate Cupcakes

1 3/4 cups sugar

3/4 cups dark cocoa powder

2 cups flour

1 1/2 teaspoon baking soda

2 teaspoons baking powder

1 teaspoon salt

3/4 cup vegetable oil

2 teaspoons vanilla extract

3 large eggs

1 cup buttermilk

1/2 cup strongly brewed coffee

For The Salted Caramel Sauce

1/2 cup granulated sugar

3 tablespoons butter, room temperature

1/4 cup heavy cream

1/4 teaspoon sea salt

For The Peanut Butter Buttercream

2 cups peanut butter

12 Tablespoons unsalted butter, softened

1 cup powdered sugar

2 Tablespoons cream

2 teaspoons vanilla extract

pinch of salt (to taste)


INSTRUCTIONS

Preheat oven to 350°F. Line 24 standard cupcake tins with cupcake liners. Set aside.

In a large bowl, whisk together sugar, cocoa powder, flour, baking soda, baking powder, and salt. In a separate bowl, whisk oil, vanilla, eggs, and buttermilk.

Pour the wet ingredients into the dry, whisking until no lumps remain. Pour in the cooled brewed coffee, mixing until just combined.

Using 1/3 cup measure or a large cookie scoop, divide the batter evenly among the cupcake tins. Bake for 22 minutes or until a knife inserted in the center comes out clean and the cupcakes spring back to the touch. Transfer the cupcakes to a wire rack to cool.

While the cupcakes cool, make the salted caramel sauce and the peanut butter frosting. To make the salted caramel, heat the sugar on medium low heat in a heavy bottomed sauce pan until its completely melted, swirling the pan gently every 20 seconds or so. The sugar will start to form clumps before melting slowly. Be patient and keep an eye on it to make sure it does not burn.

Once melted, remove from heat immediately and stir in the butter. The mixture will violently bubble. You’re doing it right.

Next, pour in the heavy cream and sea salt. Stir until everything is combined.

Pour into small bowl or cup and pop into the fridge to cool completely before using.

While the caramel cools, make the peanut butter frosting. In a stand mixer fit with the paddle attachment, combine the peanut butter and room temperature butter. Beat until creamy and completely combined, about 1 minute.

Add the powdered sugar, cream, vanilla extract, and salt and beat on low speed until combined.

Scrape down the bowl and beat on high speed until light and fluffy, about 2 minutes.

Transfer the frosting to a piping bag fitted with a star tip and set aside until the cupcakes are cool.

Once the cupcakes are cool, pipe the frosting onto each cupcake in desired design.

Drizzle with the caramel sauce if desired and top with a sprinkle of flakey sea salt. Devour!

FLOURLESS FALLEN CHOCOLATE CAKE

FLOURLESS FALLEN CHOCOLATE CAKE

 Stunningly beautiful and ridiculously tasty? Get you a cake that can do both. This flourless chocolate cake is super chocolatey with the most amazing fudgy, yet light texture. DROOL. Plus this fallen chocolate cake only calls for 7 ingredients!

I’m a little ashamed to say this, but I can be pretty shallow when it comes to desserts. What can I say, I enjoy beautiful things. Sue me.

But what *really* gets me going is a dessert that tastes just as beautiful as it looks. That’s where this super chocolatey flourless chocolate cake comes in. It falls and crackles in the most lovely chocolatey way, and with the most tender texture that’s fudgy and light at all once. Plus it’s gluten free!


INGREDIENTS

8 ounces chocolate, roughly chopped

1/2 cup unsalted butter, cut into pieces

5 large eggs, separated

3/4 cup granulated sugar

2 teaspoons vanilla extract

1/2 teaspoon salt

2 Tablespoons cocoa powder


INSTRUCTIONS

Preheat the oven to 325°F and generously butter a 9 inch springform pan with butter, then dust with cocoa powder. Set aside.

In a large microwave safe bowl combine the cubes of  butter and chopped chocolate. Place in the microwave in thirty second intervals, stirring well between each interval. Repeat until completely melted and no clumps of chocolate remain. Set aside to cool slightly.

While the chocolate cools, separate the egg whites from the yolks, placing the yolks in a separate bowl and the egg whites in the bowl of a stand mixer fit with the whisk attachment.

Beat the egg whites on medium speed, gradually increasing to high as you stream in granulated sugar to aerate the egg whites. Continue beating on high until medium stiff peaks form.

While the egg whites are beating, add the yolks one at time into the chocolate and butter mixture, whisking in between each addition. Add the vanilla, salt, and cocoa powder, whisk to combine.

Gradually incorporate the whipped egg whites into the chocolate mixture by dropping large spoonfuls at a time into the chocolate mixture and folding to combine. Mix until combined and no streaks of egg whites or cocoa powder remain. Do not over mix.

Spoon the batter into the prepared pan, using the back of a spoon or a rubber spatula to spread into an even layer.

Bake at 325°F for 45 to 50 minutes or until a knife inserted into the middle comes out clean and the edges of the cake start to pull away from the sides of the pan.

Allow to cool completely before removing from the springform pan and serving with whipped cream, raspberries or powdered sugar! Enjoy!

RED WINE CHOCOLATE CAKE

RED WINE CHOCOLATE CAKE

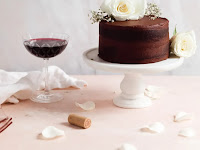
 Use up that leftover red wine with this super fudgy bold chocolate layer cake. This red wine chocolate cake is frosted with a rich chocolate buttercream for the perfect grown up chocolate treat perfect for Valentine’s Day!

This recipe is in partnership with ALDI.

Happy almost Valentine’s Day, my loves! Valentine’s Day is one of my absolute favorite days because it’s totally acceptable to eat chocolate covered strawberries and brownies all day. I mean…a holiday all about chocolate and love? What’s not to like? And this year we’ll be celebrating it with this seriously tasty red wine chocolate cake. It’s bold, it’s fudgy, it’s chocolatey and it’s super easy to make.


INGREDIENTS

For The Red Wine Chocolate Cake

1 ½ cups Baker’s Corner Granulated Sugar

½ cup Baker’s Corner Baking Cocoa

1 ⅓ cups Baker’s Corner All Purpose Flour

1 teaspoon baking soda

1 ¼ teaspoons baking powder

½ teaspoon salt

½ cup vegetable oil

2 eggs, beaten

2 teaspoons vanilla extract

1 cup Intermingle Red Wine Blend

For The Frosting

½ cup unsalted butter, room temperature

⅓ cup Baker’s Corner Baking Cocoa

1 ½ cups powdered sugar

1 teaspoon vanilla extract

2 – 3 Tablespoons Intermingle Red Wine Blend

¼ teaspoon salt


INSTRUCTIONS

Preheat the oven to 350°F and line two 6-inch cake pans with parchment paper on the bottom. Grease the sides.

In a large mixing bowl combine the Baker’s Corner Granulated Sugar, cocoa powder, all purpose flour, baking soda, baking powder and salt. Whisk to combine.

Make a well in the center and add the vegetable oil, vanilla extract, eggs, and red wine. Whisk until the batter is smooth and no lumps of flour remain.

Divide the batter evenly between the two pans and bake for 30 minutes or until a knife inserted into the middle comes out mostly clean. Allow the cakes to cool for 10 minutes before removing from the pans and transferring to a wire rack to cool completely before frosting.

While the cakes cool, combine the butter, cocoa powder, powdered sugar, salt, Intermingle Red Wine Blend, and vanilla in a stand mixer fit with the paddle attachment. Beat on low, gradually increasing the speed to high. Mix until fluffy and no streaks of cocoa powder combine.

Once the cakes are cool, place one layer on a cake stand, spread about half of the buttercream in the middle of the cake. Place the next layer on top of the cake and use an offset spatula to frost the outside of the cake, scraping off any excess frosting. Serve with red wine (obviously). Enjoy!

EASY MONGOLIAN BEEF

EASY MONGOLIAN BEEF

 One of my favorite stir fry meals is crispy Mongolian Beef. It’s one of those unique dishes I get a craving for now and then. And no other beef recipe can satisfy.

This recipe for Mongolian Beef is amazingly simple and uses few ingredients. And it really takes advantage of the special properties of a cast-iron skillet.

For this recipe, I will help you determine what cut of beef you should use. And help you out with some useful tips about how to cook with and maintain your remarkable cast iron pan.


Ingredients

1 lb. flat iron steak (thinly sliced against the grain)

1/4 cup coconut oil, avocado oil or other oil of your choice

3-4 green onions (cut into 1-inch slices)

Marinade:

2 cloves garlic (minced)

1 tsp ginger (grated)

1/4 cup coconut aminos or low sodium soy sauce


Instructions

Cut the Flat Iron Steak into very thin slices against the grain

Place the meat in a zip lock bag or a bowl. Add the coconut aminos, ginger and garlic. Marinate for 1 hour in the refrigerator.

When you are ready to cook, drain the meat from the marinade but reserve the liquid for later.

Pour the coconut oil in a large wok or cast iron skillet and heat it until it's almost smoking. Oil should be hot so you can get the nice crispy edges on the beef.

Carefully add the beef to the very hot oil and keep stir frying over a high heat. Taking care not to burn it. Normally this takes just 1-3 minutes. When the last batch of meat is in. Add the green onions and cook for the last 30 -45 seconds.

Remove the meat to a serving plate.

If you would like more sauce to serve with the meat quickly cook the remaining marinade for just a minute or two in your wok or skillet. We do this and serve it over rice and steamed veggies.

CAKE MIX TRUFFLES WITH M&MS

CAKE MIX TRUFFLES WITH M&MS

 Cake mix truffles are easy to make treats that don’t have exotic ingredients, making them the perfect dessert or sweet snack for everyone in the family. These cake mix truffles are so good, so easy, and so satisfying for everyone at any gathering that you’ll want to keep them in heavy rotation when it’s time to do some baking.

The thing that makes this recipe so great is how universal it is. There are some recipes that just don’t work outside of a certain time of the year or holiday season. For example, candy cane-based treats make the most sense around Christmas time, while ice cream-based desserts are best reserved for the warm months.


Ingredients

8 oz. cream cheese

1 box yellow cake mix

1/2 cup powdered sugar

36 M&Ms


Instructions

With a mixer, beat cream cheese until fluffy.

Add dry cake mix and whip until uniform.

Form dough into 1-inch balls and place them on a baking sheet.

Refrigerate for 1 hour.

Roll balls in powdered sugar and press an M&M in the center.

HOT COCOA BOMBS WITH A MINTY TWIST

HOT COCOA BOMBS WITH A MINTY TWIST

 Hot cocoa bombs are all the rage, and it’s easy to see why. After all, there’s nothing better than a nice, steaming cup of hot cocoa on a cold winter day. While the frigid wind blows, you’re all snug in your toasty home drinking a cup of equally toasty chocolate goodness, safe from the falling temperatures and icy wind outside.

There’s really nothing quite as cozy as hot cocoa. In fact, the only thing better than hot cocoa is homemade hot cocoa bombs. Not only do they make a delicious mug of liquid Heaven, but they are also little works of art, to boot.

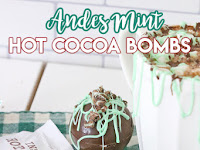
Our hot cocoa bombs have a delicious minty twist because we use Andes Mints in the recipe. It adds both an extra level of richness to the hot cocoa as well as an unexpected minty kick that goes perfectly with the chocolate.


Ingredients

12 Ounces of  Melting Chocolate – Chips or Almond Bark

2 packets of Hot Cocoa Mix – about 1 heaping teaspoon in each Cocoa bomb

1 cup of Mini Marshmallows – about 5 to each Cocoa Bomb

One package of  Andes Mint Chocolates  – 1 crumbled Andes Mint in each Cocoa Bomb – Andes Mints to decorate the tops

6 cups of Hot Milk

1 set of Silicone Molds

Melted White Chocolate to drizzle on top

Mint Green Food Coloring Gel


Instructions

Place the Chocolate in a Microwave safe bowl, and melt until smooth and creamy.

Stir well, and spoon or ladle into the molds, making sure to coat the inside of the molds.

Pour excess chocolate back into the bowl, and place the molds in the refrigerator, and let harden for 15 minutes

Remove molds from refrigerator, and carefully remove chocolate from molds, placing 6 half balls in a row on a cookie sheet.   These will be the bottom parts, or half of the Cocoa bombs. 

Heat a non stick Skillet, on low, and place one half ball with the open side down, melting just the edges for a few seconds, remove, place on a cookie sheet, and fill the Ball with the powdered Cocoa, 

Crumbled Andes Mint, and mini Marshmallows.  Repeat, until all 6 Balls are done.

Place the other half of the Chocolate balls in the skillet, with the open side down, and melt just the edges of the ball. 

Remove from the Skillet, and immediately place on one of the chocolate balls, filled with the cocoa, etc., making the top of the ball/bomb.

 Hold in place a few seconds to make sure the top and bottom are melted together.

When all the Cocoa Bombs have been filled, and melted together, place them in the refrigerator for 30 minutes, until chocolate is completely set.

 Remove from the Refrigerator, and sit the cookie sheet on the counter.

Place White Chocolate in a microwave safe bowl, and microwave at 15 second intervals until the chocolate melts.  Add the Mint Green Food Coloring Gel, and stir well. 

Place the melted chocolate in a Pastry bag, and pipe the White Chocolate over the Cocoa Bombs and sprinkle with Crumbled Andes Mints, placing one mint on the top.

 Place one Hot Cocoa Bomb in the bottom of a large mug, and pour heated milk over the top.   Cocoa Bomb will melt and bubble, and marshmallows will float to the top.  Stir the powdered cocoa, and Enjoy!

CHOCOLATE PEANUT BUTTER CAKE RECIPE

CHOCOLATE PEANUT BUTTER CAKE RECIPE

 You will love this Chocolate Peanut Butter Cake Recipe! It’s the perfect combination of creamy peanut butter filling rich chocolate cake topped with chocolate ganache.

Chocolate Peanut Putter Butter Recipe is the perfect cake for the chocolate and peanut butter lover like myself. This easy cake has become our go to for birthday’s and almost any other special occasion.  

Yes we have plenty of chocolate and peanut butter lovers in the family. But this cake would be a hit even if they weren’t your first choice.


Ingredients

Chocolate Cake

3/4 cup butter, soft

3 eggs

2 cups flour

2 cups sugar

3/4 cups cocoa powder

1 1/2 tsp baking soda

1 1/2 tsp salt

1/4 tsp baking powder

1/2 tsp vanilla

1 cup milk

1 cup buttermilk

2 tsp vegetable oil

1/2 small pkg instant chocolate pudding mix

Peanut Butter Frosting

1 cup creamy peanut butter

2 sticks butter, room temp

3 cups powdered sugar

1/2 tsp vanilla

Chocolate Ganache

1 1/2 cups chocolate chips

1 cup heavy whipping cream


Instructions

FOR THE CAKE

In mixer, cream butter and sugar together

Add eggs 1 at a time. Beat in vanilla

Combine all the dry ingredients in a separate bowl (including pudding mix)

Add dry mix to the mixing bowl alternating with the milk and buttermilk.

Add the vegetable oil and mix until well combined and not lumpy

Pour into greased/floured cake pans (2 ) 8in

Bake at 350 for about 20-25 mins until toothpick comes out clean.

Let cool 10 minutes before removing from pan


FOR THE PEANUT BUTTER FILLING

In mixer combine room temperature butter and peanut butter and beat until fluffy

Beat in vanilla and add in powdered sugar a little at a time

Mix until the frosting is smooth and fluffy

Spread over bottom layer of cake

Top frosting with the 2nd cake


FOR THE GANACHE

In a small saucepan, heat heavy whipping cream until just before it boils

Pour chocolate chips into a separate bowl

Add hot heavy whipping cream to chocolate chips and whisk until smooth consistency

Let cool for a few minutes and pour over cake starting in the center and letting in spill over the sides of the cake

Leave plain or top the cake with chopped peanut butter cups, peanut butter chips, chocolate chips, chocolate curls ect.

Easy Sugar Free Keto Peanut Butter Fudge

Easy Sugar Free Keto Peanut Butter Fudge

 There aren’t many flavors better than peanut butter and chocolate. In this sugar free keto peanut butter fudge, the two have been perfectly married together so that YOU can live happily ever after!

This isn’t the first time we’ve used these two ingredients to make a delicious treat! If you don’t believe me, check out our Low Carb Double Stuffed Peanut Butter Cups! 

Not only does this sugar free fudge taste great, but it also has the best texture!


Ingredients

1 cup Heavy Whipping Cream

2 tbsp Unsalted butter

⅓ cup Lakanto Powdered Sweetener

1 tsp Vanilla extract

½ cup Natural peanut butter

⅓ cup Lily’s baking chips


Instructions

Heat the heavy whipping cream and 2 tbsp of butter in a pot over medium high heat. 

Whisk in Lakanto's powdered monkfruit until well combined and bring the mixture to a low boil. 

Stir continuously and add in 1 tsp of vanilla extract. Continue to cook the mixture down over medium heat until it thickens and begins to turn a bit light brown in color. 

Once thickened, remove the mixture from heat and whisk in the peanut butter until smooth and creamy. 

Pour the mixture into a parchment lined loaf or other small pan. 

Wait for the mixture to cool for a few minutes, then sprinkle ⅓ cup of Lily’s baking chips across the surface of the fudge. 

Place the fudge into the freezer for 1 hour, then chill in the fridge for at least 2 hours.

Slice the fudge into 10 pieces and serve. Store remaining fudge in an airtight container in the freezer. 

Air Fryer Keto Mozzarella Sticks

Air Fryer Keto Mozzarella Sticks

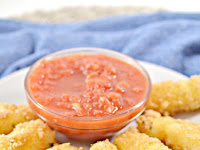
 Mozzarella sticks are a class appetizer or snack. They are so simple, yet so delicious! There is nothing quite like biting in to a hot, melty, stringy Mozzarella stick! Not only is the stringy mozzarella to die for, but the crunch of the breading is out of this world!

The bad news about traditional mozzarella sticks is that there are a ton of hidden carbs in the breading! While it may not seem like the breading that coats the hot melty cheese is very significant, the carbs contained in it can really begin to add up! Not only that, but in many varieties of mozzarella sticks there is even sugar! 


Ingredients

8 Mozzarella string cheese sticks

½ cup Almond flour

2 ½ oz Pork rinds, crushed into crumbs

1 Egg

1 tsp Garlic powder

1 tbsp Parsley flakes

Salt and pepper to taste


Instructions

Place the almond flour, garlic powder, parsley flakes as well as salt and pepper to taste into a shallow bowl or plate and mix together well.

Add the beaten egg to a bowl.

Place the crushed pork rind crumbs into another shallow bowl or plate.

Cut the mozzarella string cheese sticks in half across the middle forming a total of 16 cheese sticks.

Roll the cheese sticks into the almond flour mixture, then dip into the egg before finally dredging in the pork rind crumbs.

Place the breaded cheese sticks onto a parchment lined tray, and place into the freezer for a minimum of 2 hours and up to overnight. The more frozen the cheese sticks are, the easier it will be to air fry them without them melting too quickly.

Preheat the air fryer to 400 degrees if needed.

Place the frozen cheese sticks into the air fryer, and cook for 6-8 minutes until browned and softened, but not completely melted.

The Best Vanilla Cake Recipe!

The Best Vanilla Cake Recipe!

 If you have been looking for a fluffy, moist and delicious – not to mention quick and easy – vanilla cake, here it is…The Best Vanilla Cake Recipe! It’s the recipe that many of you requested by emailing, commenting, and messaging me for some time. As promised, here is the recipe that I think is the very best vanilla cake I’ve ever tasted!

And topped with Chocolate Buttercream Frosting? Oh my word! It is perfection!

The Best Vanilla Cake Recipe!

One of the many things that I love about this recipe is that it is versatile as any cake could ever be! It is perfect served with a thick coating of my chocolate buttercream, my vanilla buttercream, made into cupcakes or cut into pieces and served as part of a trifle and so much more!


Ingredients

3 cups all-purpose flour

2 teaspoons baking powder

1 teaspoon baking soda

1 pinch salt

1 cup butter softened to room temperature

2 cups sugar

4 large eggs at room temperature

1 cup buttermilk at room temperature

2 1/2 teaspoons vanilla extract

Chocolate Buttercream Frosting


Instructions

Preheat oven to 350º F. Prepare three 8-inch cake pans by spraying with baking spray or buttering and lightly flouring.

Combine flour, baking powder, baking soda, and salt in a large bowl. Whisk through to combine. Set aside. 

Cream butter until fluffy and then add sugar. Cream together for about 8 more minutes.

Add eggs, one at a time, and mix just until combined. 

Add flour mixture and buttermilk, alternately, beginning and ending with flour. Combine each addition until well combined.

Add vanilla and mix until thoroughly combined. 

Divide among pans and bake for 25-30 minutes until edges turn loose from pan and toothpick inserted into middle of cake comes out clean. 

Remove from the oven and allow to cool for about 10 minutes. Turn out onto wire cooling racks and allow to cool completely. 

Frost cake with Chocolate Buttercream Frosting.

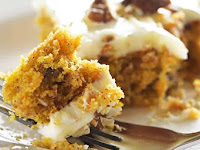
Easy Carrot Cake Sheet Cake Recipe

Easy Carrot Cake Sheet Cake Recipe

 Are you are carrot cake lover?

I have to admit that I haven’t been a fan of it until about a year or so ago.

Until then, I’d always thought of the carrot cake I’d had as a child where I had to quickly chase it with something to drink. From that point forward, I’d politely refuse it. But then, Bart let me know that carrot cake was one of his favorite cakes and I knew I had to make one that we both enjoyed!


Ingredients

4 tablespoons butter softened

5 tablespoons coconut oil, vegetable oil, or canola oil

½ cup granulated sugar

1 cup packed brown sugar

1½ teaspoons vanilla extract

3 large eggs

2 large egg yolks

2 cups all-purpose flour

2 teaspoons baking powder

½ teaspoon baking soda

2 teaspoons ground cinnamon

½ teaspoon ground ginger

1 teaspoon salt

⅓ cup buttermilk

3 cups about 6 medium grated carrots

1½ cups roasted pecans divided

Cream Cheese Frosting Recipe


Instructions

Preheat oven 350º F. Coat one baking sheet (18×13) with butter or shortening and lightly dust with flour to prevent the cake from sticking while baking. Alternately, coat well with baking spray.

Mix together butter, coconut oil, granulated sugar, and brown sugar in a large bowl with an electric mixer until well combined. Mix in vanilla extract until well incorporated. Add eggs one at a time, beating well after each addition before adding the next. Add egg yolk making sure well combined.

Whisk together flour, baking powder, baking soda, cinnamon, ginger and salt in a medium bowl.

Add half of the flour mixture to the butter and sugar mixture and beat until well incorporated. Add buttermilk, beating until just combined before stirring in remaining flour mixture.

Fold in carrots, 1 cup of pecans and spread into the prepared baking sheet.

Bake until cakes spring back when gently touched in the center and the edges begin to turn loose from the sides of the pan, about 30 – 40 minutes. Remove from the oven and allow to cool in the sheet pan on a wire rack for about 5 minutes.

Frost cake with cream cheese frosting and sprinkle with toasted pecans.

Cream Cheese Frosting Recipe

Cream Cheese Frosting Recipe

 Cream Cheese Frosting is my all-time favorite frosting! It is perfect for frosting desserts like hummingbird cake, red velvet cake, carrot cake, cupcakes, and so much more. Fluffy, creamy, and delicious this is the frosting recipe you’ll definitely want to use again and again.

This Cream Cheese Frosting is sturdy, can be easily piped for decorating cakes and cupcakes, and can be colored with food dyes similar to buttercream frosting, and did I mention it is delicious?

This frosting comes together quickly, but there are a few tips to make sure that you make the best cream cheese frosting possible.


Ingredients

2 (8-ounce) packages cream cheese, softened

1/2 cup butter softened

3 cups confectioner’s sugar sifted

1 1/2 teaspoons vanilla extract


Instructions

Combine softened cream cheese and butter with a stand or electric mixer until well-combined and creamy, about 3 minutes. Make sure that the mixture is free of any lumps.

Add confectioner's sugar, 1/2 a cup at a time. After each cup has been incorporated, turn the mixer onto the highest speed setting and for about 10 seconds to lighten the frosting.

Add in vanilla and beat until well-blended, light, and fluffy.

Use to frost cakes or cupcakes that have been cooled completely. Store in the refrigerator.

The Best Chocolate Cake Recipe {Ever}

The Best Chocolate Cake Recipe {Ever}

 The best chocolate cake recipe. Ever? There are plenty of claims for the best chocolate cake recipe. I get that. But with one bite of this decadent, moist chocolate cake with chocolate frosting, every single person around the table commented that this was the best chocolate cake they’d ever tasted.

So as for my house, this chocolate cake recipe now holds that honor.

As the compliments continued, I didn’t begin to tell them how easy it was to make.


Ingredients

2 cups all-purpose flour

2 cups sugar

3/4 cup unsweetened cocoa powder

2 teaspoons baking powder

1 1/2 teaspoons baking soda

1 teaspoon salt

1 teaspoon espresso powder homemade or store-bought

1 cup milk buttermilk, almond, or coconut milk

1/2 cup vegetable oil canola oil, or melted coconut oil

2 large eggs

2 teaspoons vanilla extract

1 cup boiling water

Chocolate Buttercream Frosting Recipe


Instructions

Preheat oven to 350º F. Prepare two 9-inch cake pans by spraying with baking spray or buttering and lightly flouring.

For the chocolate cake:

Add flour, sugar, cocoa, baking powder, baking soda, salt and espresso powder to a large bowl or the bowl of a stand mixer. Whisk through to combine or, using your paddle attachment, stir through flour mixture until combined well.

Add milk, vegetable oil, eggs, and vanilla to flour mixture and mix together on medium speed until well combined. Reduce speed and carefully add boiling water to the cake batter until well combined.

Distribute cake batter evenly between the two prepared cake pans. Bake for 30-35 minutes, until a toothpick or cake tester inserted in the center of the chocolate cake comes out clean.

Remove from the oven and allow to cool for about 10 minutes, remove from the pan and cool completely.

Frost cake with Chocolate Buttercream Frosting.

Mini Frittata Muffins + VIDEO

Mini Frittata Muffins + VIDEO

 This is one of those recipes that makes my heart so happy to bring you.

It’s quick, nourishing recipes like these mini frittata muffins that just make life easier, and although I have a blast coming up with all sorts of fun recipes to share with you here, these egg muffins are about Real Life.

With 3 kids 6 and under, Real Life is a little hectic, and there are times I wish I had 8 arms like an octopus so I could accomplish everything that needs to be accomplished.


Ingredients

8 eggs

200 grams Arla Herbs & Spices cream cheese (1 tub)

1 teaspoon salt

1/8 teaspoon pepper

1/2 cup jarred roasted red peppers finely chopped

3/4 cup fresh spinach finely chopped

1/2 cup tomatoes finely chopped


Instructions

Preheat oven to 350 degrees F and lightly grease a muffin pan (non stick or silicone).

In a large bowl, whisk together eggs, cream cheese, salt and pepper until smooth.

Stir in peppers, spinach and tomatoes and fill muffins cups (about 3/4 full). 

Bake for 20-25 minutes until centers are completely set. Serve immediately or cool to room temperature to store. 

Mini frittatas can be stored in the refrigerator for up to 1 week or in the freezer for 2-3 months.

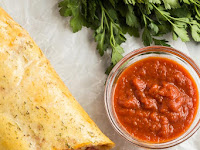
Easy Stromboli

Easy Stromboli

 I shared this recipe first on Spend With Pennies.

It’s been a while since The Recipe Rebel has seen a 30 minute meal that is as easy and loveable as this Stromboli!

Anything that is pizza-flavored, in any form, is a hit here with the whole family.


Ingredients

1 can refrigerated pizza dough enough for 1 pizza

1 1/2 cups shredded mozzarella cheese divided

1/3 cup marinara sauce

1/2 cup chopped cooked ham

1/2 cup sliced salami

1/2 cup pepperoni slices

1 egg

1 tablespoon water

1/2 teaspoon Italian seasoning

1/4 teaspoon garlic powder


Instructions

Heat oven to 350 degrees F and line a baking sheet with parchment paper.

Roll pizza dough out on a lightly floured surface into a roughly 12″ x 16″ rectangle (it doesn’t have to be exact!).

Spread marinara sauce over pizza dough, but leave one inch all the way around and 2-3″ at the long side furthest from you.

Top with 1 cup of the shredded cheese, then ham, salami and pepperoni. Finish with remaining 1/2 cup cheese.

Roll up as tightly as possible, doing your best not to push out the toppings as you do so. Stop just before you reach the end.

Whisk together egg, water, Italian seasoning and garlic powder. Brush over pizza dough where the edges will meet, then pinch together.

Place on prepared baking sheet with the seal down and brush with egg wash.

Bake for 20-25 minutes, until golden brown and slightly puffed. Let rest for 5-10 minutes before slicing.

Turkey Alfredo Stromboli

Turkey Alfredo Stromboli

 This Turkey Alfredo Stromboli, friends — it’s a good one!

It’s got the perfect combination of easy, hearty and comforting for those chilly days we all know are ahead for quite some time yet (especially if you’re in Manitoba like we are!). It has so many of my favorite things:

I always buy an extra turkey early in the fall when they are featuured for the holidays — a small one that I can fit in my slow cooker and make this Crockpot Turkey with Garlic Butter, then I use the carcass to make broth, and soup, and I chop or shred the rest of the meat to freeze for easy meals down the road.


Ingredients

Alfredo Sauce

1/4 cup butter

1 teaspoon minced garlic

1/2 teaspoon Italian seasoning

1/4 teaspoon salt

1/8 teaspoon pepper

3 tablespoonsq all purpose flour

2 cups half and half or milk

1/4 cup shredded Parmesan cheese

Stromboli

1 refrigerated pizza dough (391g can)

prepared Alfredo sauce

1 cup chopped, cooked turkey

1 cup shredded mozzarella cheese

1 egg

1 tablespoon water

garlic powder and Italian seasoning to sprinkle as desired


Instructions

Alfredo Sauce

In a medium pot, melt butter. Stir in garlic, Italian seasoning, salt, and pepper.

Whisk in flour and cook 1 minute.

Add half and half or milk, and whisk until combined. Cook over medium heat, whisking often, until thickened. Set aside.

Stromboli

Preheat oven to 350 degrees F.

Unroll pizza dough and roll with a rolling pin into a rough 12×18" rectangle.

Spread pizza dough with 3/4 cup prepared sauce (the rest will be used for dipping), top with turkey and mozzarella.

Fold in the short ends about 1/2" to contain the filling, then roll up the stromboli, standing at the long edge. Pinch dough to seal.

*Stir together egg and water until combined. Brush a small amount over top of stromboli, and sprinkle with a small amount of garlic powder and Italian seasoning.

Place on a parchment lined baking sheet and bake for 20-25 minutes, until golden brown.

Let rest for 5-10 minutes, then slice and serve with remaining sauce.

The Best Burgers

The Best Burgers

 I know what you’re thinking.

I sure do make a lot of promises I could never keep. I make “the best” this and “the best” that, but how could I really know? Have I tried them all?


No. No I haven’t.

Ingredients

1 tablespoon butter

1 medium red onion thinly sliced

1 tablespoon brown sugar

1 teaspoon minced garlic

1 teaspoon chili powder

1/2 teaspoon salt

1/4 teaspoon black pepper

1 lb lean ground pork

1 lb extra lean ground beef

1 egg

1/2 cup fine seasoned bread crumbs see above for gluten free options

2 tablespoons balsamic vinegar

1 tablespoon worcestershire sauce

Barbecue sauce for basting and toppings as desired


Instructions

In a medium pan, melt butter over medium heat and add onions, stirring until coated. Cook over medium heat, stirring occasionally, for 5-8 minutes, until tender and translucent.

Add brown sugar and continue cooking for another 8-10 minutes, until caramelized.

Add garlic, chili powder, salt and pepper and cook over medium heat 1 minute. Remove from heat, scrape into a bowl and refrigerate until room temperature (if you’re making this ahead, be sure to cover the dish after the onions have cooled to store for longer periods of time).

In a large bowl, combine pork, beef, egg, bread crumbs, vinegar worcestershire sauce and cooled onion mixture and mix just until combined — don’t overmix.

Shape into 8 patties for ¼ pound burgers (feel free to make them bigger or smaller according to your preferences).

*Recommended: place on a baking sheet, cover with plastic wrap and refrigerate for at least 2 hours or up to 24 hours. You can also place in the freezer for 2-3 hours. This isn’t necessary but really helps the flavors meld together and helps the burgers stay together when cooked.

In a pan or on a grill, cook burgers for about 4-5 minutes per side on medium-high heat until internal temperature reaches 160 degrees F. Serve as desired with buns, garnishes, sauces, etc.

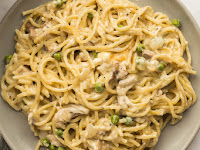
Chicken Tetrazzini

Chicken Tetrazzini

We’ve come to the end of the month and I’m sharing my last chicken dinner to make with this month’s 6 Ingredient Staple: this Perfect Roast Chicken!

With our chicken carcass (it’s gold — don’t throw it out!) we made this Homemade Chicken Stock, and with our stock we made this classic Chicken Noodle Soup.

Now we’re taking our chicken and chicken stock to the next level with this easy Chicken Tetrazzini.


Ingredients

Sauce

¼ cup unsalted butter

1 cup chopped mushrooms

½ medium onion finely diced

1 teaspoon minced garlic

1 teaspoon Italian seasoning

¾ teaspoon salt

¼ teaspoon black pepper

¼ cup all purpose flour

2 cups chicken stock

2 cups cream – 10%-18%

2 cups cooked, chopped chicken

1 cup frozen peas

To Assemble Tetrazzini:

375 grams dry spaghetti about 13oz

1 cup shredded mozzarella cheese


Instructions

Sauce

In a large skillet, melt butter.

Add mushrooms and onion and saute over medium heat until onion is softened and mushrooms are browned, about 5 minutes.

Add garlic, Italian seasoning, salt, and pepper and cook 1 minute.

Stir in flour until completely absorbed by the butter.

Add chicken stock and cream and whisk until smooth. Continue cooking over medium heat, whisking often, until slightly thickened (it won't be super thick in the end).

Stir in cooked chicken and peas.

Chicken Tetrazzini

Preheat the oven to 400 degrees if baking immediately.

Place spaghetti in a large pot of boiling, salted water and cook just until al dente. Drain.

Place cooked pasta in a 9×13" greased baking dish. Pour sauce over top and spread with a spatula over pasta so that it soaks down into the spaghetti.

Sprinkle with cheese and bake for 20 minutes or until golden and bubbly (see post above for make ahead instructions).

Sheet Pan Parmesan Chicken and Veggies

Sheet Pan Parmesan Chicken and Veggies


Ingredient:

1 tablespoon dried oregano

1 tablespoon dried parsley

1 teaspoon paprika

½ teaspoon garlic powder

¼ teaspoon seasoned salt, or to taste

¼ teaspoon ground black pepper, or to taste

½ pound fresh green beans, trimmed

1 small red potato, diced

1 sweet bell pepper, chopped

1 cup broccoli florets, chopped

1 tablespoon minced garlic

3 tablespoons olive oil

⅓ cup all-purpose flour

4 tablespoons butter, melted

1 cup panko bread crumbs

1 cup freshly grated Parmesan cheese, divided

1 ½ pounds skinless, boneless chicken breasts, pounded flat

Optional Dipping Sauce:

½ cup mayonnaise

¼ cup ketchup

½ teaspoon garlic powder

¼ teaspoon Worcestershire sauce


Step 1

Preheat the oven to 400 degrees F (200 degrees C). Line a sheet pan with parchment paper.

Step 2

Combine oregano, parsley, paprika, garlic powder, seasoned salt, and pepper in a small bowl.

Step 3

Place green beans, potato, bell pepper, broccoli, and garlic on the prepared sheet pan. Drizzle olive oil on top and sprinkle with 1/2 of the seasoning mix; toss to coat. Spread vegetables on one side of the pan.

Step 4

Place flour in a bowl. Place melted butter in a second bowl. Combine panko, 2/3 cup Parmesan cheese, and the remaining 1/2 of the seasoning mix in a third bowl.

Step 5

Remove any excess fat from chicken breasts and slice into 1 1/4 inch strips. Coat chicken strips in flour, then dredge in melted butter, and then dip in the Parmesan-panko mixture until heavily coated. Place on the empty half of the sheet pan and sprinkle with any remaining Parmesan-panko mixture, pressing onto the chicken.

Step 6

Bake in the preheated oven for 10 minutes. Remove from the oven, flip chicken strips, stir the veggies, and return to the oven. Bake until chicken juices run clear and veggies are crisp-tender, 10 to 15 minutes. An instant-read thermometer inserted into the center of the chicken should read at least 165 degrees F (74 degrees C).

Step 7

While the chicken is baking, whisk together mayonnaise, ketchup, garlic powder, and Worcestershire sauce.

Step 8

Remove chicken and veggies from the oven. Toss veggies with remaining Parmesan cheese. Serve with dipping sauce.

Rosemary Beef Roast over Cheesy Polenta

Rosemary Beef Roast over Cheesy Polenta


 Ingredients

1/4 cup minced fresh rosemary

3 garlic cloves, minced

3 teaspoons salt, divided

1 teaspoon pepper

1 boneless beef chuck roast (3 pounds)

1 tablespoon canola oil

1 cup beef broth

2 cups water

2 cups 2% milk

1 cup cornmeal

1/2 cup shredded Parmesan cheese

3 tablespoons butter, cubed

Directions

Mix rosemary, garlic, 2 teaspoons salt and pepper; rub over meat. In a large skillet, heat oil over medium-high heat; brown meat. Transfer meat a 5- or 6-qt. slow cooker. Add broth to skillet; cook 1 minute, stirring to loosen browned bits from pan. Pour over meat. Cook, covered, on low until meat is tender, 7-9 hours.

For polenta, in a large heavy saucepan, bring water, milk and remaining 1 teaspoon salt to a boil. Reduce heat to a gentle boil; slowly whisk in cornmeal. Cook and stir with a wooden spoon until polenta is thickened and pulls away cleanly from sides of pan, 15-20 minutes. (Mixture will be very thick). Remove from heat; stir in Parmesan cheese and butter. Serve with roast. If desired, serve with additional rosemary and Parmesan cheese.

Nutrition Facts

1 serving: 471 calories, 25g fat (11g saturated fat), 130mg cholesterol, 1216mg sodium, 19g carbohydrate (3g sugars, 1g fiber), 39g protein.

Best Chocolate Bundt Cake

Best Chocolate Bundt Cake

 A few decorating tips, a few colors of buttercream, and a phenomenal chocolate bundt cake are all you need for this easy peasy Harvest Chocolate Bundt Cake!


INGREDIENTS

2 c granulated sugar

1 3/4 c all-purpose flour

3/4 c baking cocoa

2 tsp. baking soda

1 tsp. baking powder

1 tsp. salt

2 large eggs room temperature

1 c strong brewed coffee

1 c buttermilk

1/2 c canola oil

1 tsp. vanilla extract


INSTRUCTIONS

In a large bowl, whisk together the sugar, flour, cocoa, baking soda, baking powder, and salt.

Add the eggs, coffee, buttermilk, oil, and vanilla.

Beat on medium speed for 2 minutes with a hand-held mixer (batter will be thin).

Pour into a greased and floured bundt pan. (You can also spray pan with non-stick baking spray or spread

GOOP around pan)

Bake at 350° for 45-50 minutes or until a toothpick inserted in the center comes out clean.

Cool for 10 minutes before removing from pan to a wire rack to cool completely.

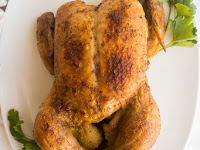
Perfect Roast Chicken

Perfect Roast Chicken

 Happy January!

Today I’m kicking off a brand new extension of Six Ingredient Suppers, which I’m calling Six Ingredient Staples.

On the first Monday of each month, I’m sharing a new staple recipe, and every Monday after that I’ll be sharing a new way to use it!


Ingredients

3-4 lb whole chicken

1/4 cup melted unsalted butter

2 teaspoons salt (you can reduce if you are sensitive to sodium or your chicken is smaller)

1/2 teaspoon paprika

1/2 teaspoon garlic powder

1/4 teaspoon black pepper


Instructions

Preheat oven to 425 degrees F.

Remove the giblets and neck from the inside of the chicken if they are there.

Combine melted butter with salt, paprika, garlic powder and pepper.

Use an upside down tablespoon (see video for a visual) to loosen the skin from the chicken breast and drumsticks as best you can.

Pour some of the melted butter under the skin onto the breasts and drumsticks and use the tablespoon to spread it around. Spread the rest of it onto the outside of the chicken on top of the skin (I do breast side only, as the underside of the chicken will be seasoned as it cooks)

Tie the legs tight to the body and tug the wings underneath (or you can tie the wings to the body as well).

Roast, uncovered, for 1 hour to 1 hour and 30 minutes, depending on the size of your chicken (for a 3.5 lb chicken, I roast exactly 1 hour 10 minutes), until a meat thermometer inserted in the thickest part (inner thigh near the breast but away from the bone), reads at least 165 degrees F. If your chicken is darkening quickly, you can tent with tin foil to prevent further browning.

Remove from the oven and let rest for at least 15 minutes before slicing and serving.

Slow Cooker Chicken Breast

Slow Cooker Chicken Breast

 This chicken is so flavorful, and so juicy, with just a few ingredients (and one secret ingredient!).

I will admit, I have made plenty of dry, overcooked, unpalatable boneless chicken breasts in the slow cooker. I’m not proud of it, but we all do it every now and then, am I right??

I wanted to come up with a foolproof way to make great crockpot chicken breast — that is big on flavor (but still versatile enough to use it a variety of different ways or add your own sauce at the end), and ridiculously juicy.


Ingredients

4 boneless skinless chicken breasts

1/4 cup low sodium chicken broth

1 tablespoon butter or margarine

1/2 teaspoon salt

1/2 teaspoon dried parsley

1/4 teaspoon garlic powder

1/8 teaspoon black pepper

1/8 teaspoon onion powder

1/8 teaspoon paprika


Instructions

In a small bowl, stir together the salt, parsley, garlic, pepper, onion powder and paprika. Season both sides of the chicken.

Add chicken broth and butter to slow cooker, and stir to combine (mash the butter up a bit to disperse if you can).

Add the chicken to the slow cooker, overlapping only as much as necessary.

Cover and cook on low for 3 hours or until an internal temperature of 165 degrees F is reached. 

If you’re hoping for clean slices, remove to a cutting board and cover to keep warm. Let sit for 10 minutes before slicing.

Rhubarb Cake with Vanilla Sauce

Rhubarb Cake with Vanilla Sauce

 One of my goals for 2019 has been to cook and bake more for fun.

Although I love food blogging, and I feel like the luckiest person on the Earth to be able to work from home, dreaming up all sorts of recipes, there are times when it is a lot more like work and a lot less like fun

In fact, it is this way most of the time.


Ingredients

Rhubarb Cake

2 tablespoons oil

1 cup granulated sugar (200g)

1 cup buttermilk (or sub regular milk)

1 egg

1 teaspoon vanilla extract

2 cups all purpose flour (fluffed and levelled, or 260g)

1 teaspoon baking powder

1/2 teaspoon baking soda

1/2 teaspoon salt

4 cups chopped rhubarb (fresh or frozen, thawed, about 600g)

Streusel

1/4 cup all purpose flour (32g)

1/4 cup granulated sugar (50g)

2 tablespoons melted butter

Vanilla Sauce

1/2 cup butter

3/4 cup granulated sugar (150g)

1/2 cup evaporated milk (or sub whole milk or half and half)

1 teaspoon vanilla extract


Instructions

Rhubarb Cake with Streusel

Preheat the oven to 350 degrees and lightly grease a 9×9″ or 9×13″ pan (both work fine — if you use a 9×13″ it will bake for less time and be a shorter cake.)

In a large bowl, whisk together the oil and sugar for 1-2 minutes.

Add buttermilk, egg and vanilla and whisk until smooth.

Add the flour, baking powder, baking soda, and salt and stir until combined. Stir in the rhubarb and spread into prepared pan.

To make the streusel, combine melted flour, sugar and melted butter until crumbly. Sprinkle over cake.

Bake for 55-65 minutes for a 9×9″ pan, or 35-45 minutes for a 9×13″ pan, until a toothpick comes out clean or with moist crumbs. (Check first at the earliest time, and add time in 5 minute intervals until it is baked through) If the edges begin to darken too much, cover with foil for the last 15-20 minutes of bake time.

Vanilla Sauce

In a small saucepan, melt butter over medium heat.

Add the sugar and milk and bring to a boil over medium high heat, stirring often. 

Boil for 3-4 minutes, until thickened slightly. Serve warm with cake.

Strawberry Lemon Angel Food Cake Roll

Strawberry Lemon Angel Food Cake Roll

 This recipe feels like a long time coming, but here we are.

Last year I made 3 or 4 angel food cake rolls alone, because you just loved them! Angel food cake rolls are seriously so easy, and you can fill them with almost anything.

So I’m back with something summery!

Strawberries and lemon are pretty much my two favorite dessert flavors ever, so we are combining them here for the ultimate fresh and fruity dessert.


Ingredients

Angel Food Cake

1 box plain Angel Food Cake mix

1 1/4 cups cold water (or what is required on box)

Lemon Curd

1 cup granulated sugar 200g

4 eggs

3/4 cup fresh squeezed lemon juice

zest of 1 lemon

2 tablespoons butter

Cream Cheese Whipped Cream

4 oz cream cheese (1/2 250g package) room temperature

1/2 cup powdered sugar

1 cup heavy whipping cream

1 lb fresh strawberries finely chopped


Instructions

Angel Food Cake

Preheat oven to 350 degrees F and line a 10x15x1″ rimmed baking sheet with parchment paper (a little cooking spray on the pan helps the parchment to stay put!)

In a large bowl, whisk together the cake mix and required amount of water as directed on the box.

Pour into prepared pan and bake for 20-23 minutes, until light golden brown on top.

Dust a clean, lint-free kitchen towel with powdered sugar and turn the warm cake out onto the towel. Peel off the parchment. 

Roll the cake up with the towel, starting at the short end. Let cool completely (if leaving it more than a few hours, be sure to wrap completely in a towel or place in an airtight container or bag).

Lemon Curd

While your cake is cooling, make your lemon curd. In a large saucepan, whisk together sugar, eggs, lemon juice and lemon zest.

Cook over medium heat, whisking constantly, until thickened (it will coat the back of a spoon).

Strain through a fine mesh sieve to remove any lumps. Press a piece of wax paper or plastic wrap onto the surface of the lemon curd in the bowl and refrigerate until chilled, at least a few hours.

Assembly

Just before assembling, make your whipped cream. In a large bowl, beat your room temperature cream cheese with an electric mixer until smooth. 

Add powdered sugar and beat again until combined. Add cream and beat on low until incorporated, then on high until thickened and fluffy (see video for desired texture).

Carefully unroll the cooled cake. Spread with lemon curd, leaving a few inches at the far end of the cake (it will squish down as you roll it).

Cover with chopped strawberries (save some for the top!) and carefully roll back up. 

Place on a serving plate and cover with cream cheese whipped cream, then decorate with strawberries and lemon slices if desired.

Blueberry Coffee Cake

Blueberry Coffee Cake

 I mean, cake for breakfast is a real thing right?

This Blueberry Coffee Cake is blurring the lines between breakfast, brunch and dessert and I’m not mad about it.

A tough Monday? It’s breakfast!


Ingredients

1/2 cup canola oil (100g)

1 cup plain Greek yogurt (or sour cream)(250g)

1 1/4 cup light brown sugar packed (260g)

2 eggs

1 teaspoon vanilla extract

1 teaspoon baking powder

1/2 teaspoon baking soda

1/2 teaspoon salt

2 cups all purpose flour (260g, fluffed and levelled)

2 1/2 cups fresh or frozen blueberries (see notes in post above)

Streusel

1/2 cup unsalted butter

1 1/4 cup all purpose flour

3/4 cup brown sugar (packed, 150g)

Glaze

3/4 cup powdered sugar

1 tablespoon milk

1/2 teaspoon vanilla extract


Instructions

Preheat oven to 350 degrees F and line a 9″ Springform pan with parchment paper (just pinch it in the bottom). Lightly grease the sides.

In a large bowl, whisk together oil, yogurt and brown sugar until combined and smooth.

Add eggs, vanilla, baking powder, baking soda and salt, and whisk until smooth.

Add the flour and whisk just until combined. Stir in the blueberries with a spatula (if desired, toss with 1 tablespoon flour to help prevent sinking).

Spread batter in prepared pan.

In a medium bowl, melt the butter for the streusel in the microwave (high for 40 seconds works for me — be sure to cover it!).

Stir in flour and sugar until it forms a crumbly mixture. Sprinkle over batter in pan, breaking into small pieces with your fingers.

Bake for 60-75 minutes (70 is usually perfect for me, but this can take longer with frozen berries), until a toothpick inserted in the center comes out clean or with moist crumbs.

Let cool to room temperature on a wire rack.

For the glaze, stir together powdered sugar, milk and vanilla. Drizzle over coffee cake before serving.

Easy Tiramisu

Easy Tiramisu

 Just two weeks until school starts up here again and I’m enjoying as much of summer as I can!

This includes my most recent addiction — an afternoon pick-me-up in the form of this easy Tiramisu recipe 😉

It’s cool, creamy, make ahead deliciousness with a kick! (or you can skip the kick — more on that later 😉 )


Ingredients

Custard:

4 egg yolks

1/2 cup granulated sugar

1/2 cup whole milk

8 oz/225 grams mascarpone

1 teaspoon vanilla

1 cup heavy whipping cream

Tiramisu:

2/3 cup strong brewed coffee or espresso room temperature

2 tablespoons Kahlua liquor or brandy

18-20 ladyfinger cookies

cocoa powder and chocolate shavings for serving as desired


Instructions

In a medium saucepan, whisk egg yolks, sugar and milk together until combined. Place over medium heat, and cook, whisking constantly, until thickened (don’t rush — this can take 10-15 minutes).

Remove from the heat and stir in mascarpone and vanilla. Let cool to room temperature.

Whip cream with an electric mixer until stiff peaks form. Gently fold into the cooled custard.

In a small bowl, combine coffee and Kahlua.

Dip ladyfingers in coffee mixture, turning in the liquid 2 or 3 times. Place a single layer in the bottom of an 8×8″ pan.

Cover with half of the mascarpone custard, then repeat layers one more time.

Cover and chill for at least 6 hours before serving. Dust with cocoa powder and top with chocolate shavings before serving as desired.

Coconut Date Pudding Cake

Coconut Date Pudding Cake

 So I was asked to bring a dessert to my in-laws for Thanksgiving.

That’s pretty normal, except for the one time my mother-in-law accidentally asked me to bring a salad. I was a little confused, but I wasn’t going to ask her what she was thinking, so I made a salad. I’m sure I used a recipe and everything.

She’s never asked me to bring another salad.


Ingredients

Cake

1 cup chopped pitted dates

1 cup water

1 tsp baking soda

3 tbsp butter

Pinch of salt

1 1/2 cups all-purpose flour I do about 50% whole wheat

1 tsp baking powder

1/2 tsp salt

1 cup sugar

1 tsp vanilla

1 large egg

Topping:

3/4 cup packed light brown sugar

3/4 cup flaked sweetened coconut

3 tbsp butter

2 tsp milk


Instructions

Preheat oven to 350 degrees F. Grease and flour a 9″ springform pan (you can use a regular 9″ pan as well).

In a small pot, combine dates, water, baking soda, butter and salt and bring to a boil, stirring occasionally. Set aside for 10 minutes for dates to soften.

In a large bowl, combine flour, baking powder, salt, sugar, vanilla and egg. Pour in date mixture and whisk until combined. (I like to mash my dates a little with the whisk as I go).

Spread into prepared pan and bake for 20 minutes.

Meanwhile, prepare your topping. Combine brown sugar, coconut, butter and milk in a small pot (I use the same one from the dates, and just wipe it out a little). Bring to a boil and reduce to simmer for 1 minute.

Pour brown sugar mixture over cake and bake another 10-12 minutes, until a toothpick comes out clean.

Cool 5 minutes before running a knife around the edge and loosening the sides of the pan. Serve warm or cool completely before serving.

No Bake Nanaimo Bar Cheesecake Recipe + VIDEO

No Bake Nanaimo Bar Cheesecake Recipe + VIDEO

 Happy December friends! I am continuing on my quest to turn all of my favorite Christmas treats into a cheesecake with this No Bake Nanaimo Bar Cheesecake — maybe my favorite so far (although this No Bake Peanut Butter Marshmallow Square Cheesecake is equally as delicious!).

Naniamo Bars are just one of my favorite classic Canadian treats (friends, we have some incredible eats up here!) and they originated in Nanaimo, B.C.. Makes sense, right??

For this cheesecake, I have borrowed the base for this cheesecake from the Nanaimo Bar recipe on Nanaimo’s web site, although I have simplified the method a little to suit my lazy girl baking style.


Ingredients

Crust

1/2 cup butter

1/2 cup sugar

4 tablespoons cocoa

1 egg beaten

1 cup graham cracker crumbs

1/2 cup finely chopped almonds

1 cup sweetened shredded coconut unsweetened will work fine

Filling:

3 packages cream cheese 8 oz

1/2 cup Bird’s custard powder

1 cup heavy whipping cream 35%

1 1/2 cups powdered sugar

Ganache

3/4 cup finely chopped dark chocolate 1 100g bar

1/3 cup heavy cream


Instructions

CrustIn a large pan, melt the butter over medium heat. Remove from heat and stir in sugar and cocoa.

Gradually whisk in egg, stirring constantly. The heat from the pan and the butter will cook the egg as you stir (no raw eggs!).

Stir in graham crumbs, almonds, and coconut until combined. Press firmly into a 9″ Springform pan.

Filling: In a large bowl, beat cream cheese until smooth.

Add custard powder, cream and sugar and beat until light and fluffy. Pour into Springform pan over crust and refrigerate to chill.

Ganache: In a medium microwave-safe bowl, melt chocolate and cream in 15-20 second intervals, stirring well each time, until smooth (be careful NOT to overheat the chocolate or it will seize!) — I only had to do this twice.

Remove cheesecake from the fridge or freezer and pour over top, smoothing to the edges. Refrigerate until completely set, at least 5-6 hours, before serving. Refrigerate leftovers up to 3-4 days or freeze up to 3 months.

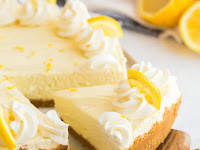
No Bake Lemon Cheesecake

No Bake Lemon Cheesecake

 If there are two things I love in this world, it’s lemon and cheesecake.

Especially a light, airy, and just tangy enough No Bake Lemon Cheesecake like this one!

As a kid, I didn’t enjoy citrus or lemon desserts very much at all. It seemed wrong that they just weren’t that sweet!

Now that I’m older (more experienced and more mature, I’d like to think 😉 ), my tastes have changed and I much prefer a tangy lemon dessert with the right amount of sweetness over some sugar-laden cake with several inches of frosting.


Ingredients

Crust

2 1/2 cups graham cracker crumbs (375g)

1/2 cup butter melted

Filling:

3 packages cream cheese (24oz or 750g total) full fat

1 1/2 cups powdered icing sugar

3 tablespoons fresh squeezed lemon juice (about 1 lemon)

zest of 2 lemons (1 if you want a milder flavor)

1 teaspoon vanilla extract

3/4 cup heavy whipping cream (30-35% fat ONLY)


Instructions

Line a 9" Springform pan with parchment paper — optional but makes for easy removal once set!

Combine graham cracker crumbs and butter and press into prepared pan, and about 1/2" up the sides.

In a large bowl, beat the cream cheese with an electric mixer on medium speed until smooth.

Add the powdered sugar, lemon juice, lemon zest, and vanilla and beat until smooth.

Add whipping cream and beat on low until combined, then beat on high for 3-4 minutes until fluffy and thickened (the mixture should hold stiff peaks on the beaters — see the recipe video for the texture and thickness you are looking for). Taste the filling, and add more sugar or more lemon zest if you want it sweeter or more lemony.

Pour filling into crust, cover and refrigerate until set, at least 6 hours or overnight is even better! Serve with sweetened whipped cream.

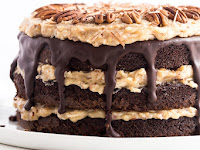
German Chocolate Cake

German Chocolate Cake

 We’re smack dab in the middle of January and I’m here with a luscious German Chocolate Cake recipe 😉

But sometimes I struggle with getting back to routine after the holidays, and cake always helps. Especially if it’s chocolate!

I’m sharing tons of tips and tricks to make this your best German Chocolate Cake yet, including tips to make ahead and freeze, so be sure to skim through the post below to ensure success!

And if you’re a chocolate fanatic like myself, you might also enjoy my ultra popular The Best Chocolate Cheesecake Recipe, this Crockpot Hot Chocolate, or my Grandma’s Hot Fudge Sundae Cake!


Ingredients

Cake

2 cups granulated sugar

1/2 cup canola oil

1 cup milk

2 large eggs

1 teaspoon vanilla

1 3/4 cup all purpose flour fluffed and levelled

3/4 cup unsweetened cocoa powder

2 teaspoons baking soda

1 teaspoon salt

1 teaspoon baking powder

1 cup hot coffee or water

Frosting

1 cup heavy cream

1 cup granulated sugar

3 egg yolks

1/2 cup unsalted butter

1 1/2 cups sweetened shredded coconut

1 cup finely chopped pecans

1 teaspoon vanilla extract

Ganache

100 grams dark chocolate about 3/4 cup chopped

1/4 cup heavy cream


Instructions

Cake

Lightly grease and flour three round 8″ cake pans, tapping firmly to remove any excess flour once coated. Set the oven to 350 degrees F.

In a large bowl, whisk together sugar and oil until combined.

Add milk, eggs and vanilla and whisk until smooth.

Add flour, cocoa powder, baking soda, salt and baking powder and whisk until combined.

Slowly stir in hot coffee until batter is smooth — it will be thin.

Divide evenly between prepared pans and bake for 20-22 minutes, until a toothpick in the center comes out dry or with moist crumbs. Set aside to cool completely.

Frosting

In a medium saucepan, whisk together cream, sugar and egg yolks until combined.

Add butter, and cook over medium heat, whisking often, until thickened, about 5-10 minutes.

Remove from heat and stir in coconut, pecans and vanilla.

Let cool completely to room temperature (to a spreadable consistency) before frosting cooled cakes — if you need to cool quickly, pour into a clean bowl and place in the refrigerator for 20-30 minutes, stirring often.

Ganache & Assembly

In a small pot, melt chocolate and cream together over low heat, stirring often. Set aside to cool slightly.

Place one cake layer on a serving plate. Top with 1/3 of the coconut pecan frosting.

Repeat with remaining two layers, spreading chocolate ganache on the top cake layer and letting set completely before topping with remaining frosting (optional: you can reverse the order, and spread remaining frosting on top cake layer, then spread and drip the ganache on top). Let chocolate cool completely before slicing.